Showing posts with label finished. Show all posts

25 September 2015

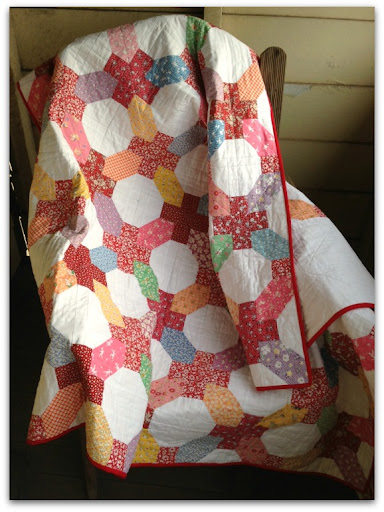
Shaded Nine Patch Quilt Finished

This was the second project I started when I got back into quilting a couple of years back. It got as far as having the nine patches made and I was then distracted by other things. The last couple of months have been all about finishing off all my UFO's. This is the second last one. I just need to bind one more quilt and then I will have NO UFO's at all!!

This means I can now start working on new projects!! But they will be slow going as all my spare time is going into my new uni course.

All the posts about Shaded Nine Patch


8 September 2015

Left Over Log Cabin Finished

Another UFO bites the dust!! Only a couple more to go! I call this one Left Over Log Cabin because it is made up of the left over 1 1/2" strips I used for my Omigosh Redux quilt. I just kept cutting and ended up with way too many. I'd never made a Log Cabin quilt before, so I thought this would be a good use of the strips. I made may Pink and Grey Zig Zag log cabin at the same time.


I played around with the layout for a while and came up with this one. I like the old school look. This is my second quilt with a wool wadding. I think this will be a great lap quilt. I had it quilted with baptist fan by Kathy at KoolKat Quilting. She did a great job. The only issue, and this has NOTHING to do with the quality of the quilting, is that it is a bit closely quilted and as a result, stiff, for my taste. I wish I could've had it done on a large scale.


22 August 2015

Urban Bushland Quilt Finished

Urban Bushland is finished and I'm very happy with it. I was a bit worried that the linen might prove a bit difficult to quilt since it is such a slippery and soft fabric to work with. But Kathy at KoolKat Quilting has done a great job with it. If you are looking for someone to do quilting, they currently have a half price deal on. If you get a quilt done with the budget pattern, it's only $1.50 a square foot. Check out their home page (near the bottom) for details. Feel free to mention I referred you (I'm Michelle from Callaghan)!!! It runs out on 1 Sep 2015 but they guarantee a 7 day turnaround (which I have received for all quilts I've had done with them) and free postage (there and back) anywhere in Australia!

Not the best photo but this quilt turned out huge!!

Here is a close up of one of the corners. It's an all over leaf pattern done in a brown to match the borders.

Below is a close up of the centre panel and some of the border.


To see all posts about - Urban Bushland


10 June 2015

Sunkissed Granny Square #2 Finished

This one has been finished for a while, but I've only just gotten around the getting photos.


18 November 2014

Embers and Ash (Orange and Grey Block Quilt) Finished

Another one bites the dust!! The Orange and Grey Block quilt is finished. It's been done for a few days but I couldn't get a decent photo.

I'm bad at coming up with names, so I asked for suggestions on one of my quilting lists. So far, I'm loving the suggestion of "Embers and Ash"!! (Thanks Kayt!!)

This quilt was inspired by "A New View" by Esch House Quilts found via Pinterest.
And a close up.

And the back.


Progress posts also available.

7 November 2014

Finished - Old Fashioned Charm

After 15 years, Old Fashioned Charm is now complete!!! And has been in a show!!! Everything gets exclamation marks!! Because IT IS FINLLY DONE and I still LOVE IT!! To see the various stages of productions view these posts.


7 October 2014

Blocking Quilts - Old Fashioned Charm

I've slowly (over 15 YEARS) been working on this quilt. It is now nearly done. I plan on putting it into my Guild exhibition. However, it had a few issues. Firstly, it was only about the third quilt I made. Secondly, it is completely hand pieced, hand appliqued and hand quilted. As a result, it wasn't the most square quilt I've made. Also, as it's been made over such a long period of time, it was a bit smelly (mainly from sitting in my spare room which could get a bit musty over winter).

So before I could put it out in public, it needed a wash. I figured that since I was doing that, I'd take the opportunity to block the quilt. This had two benefits, it would let me square up the quilt and also reduce wrinkling. I know that some people like that look, but I don't. So this whole process solved a whole lot of problems.

So first off, I gave the quilt a good soak in the bath. First round in plain water. I'd used water soluble pen for marking the quilting. It's important to remove this with plain water before washing as some people have had the markings made permanent if washed with detergent before removing the pen lines. Then second round using liquid Napisan. Then a rinse in clean water. I then ran it through the spin cycle on gentle.

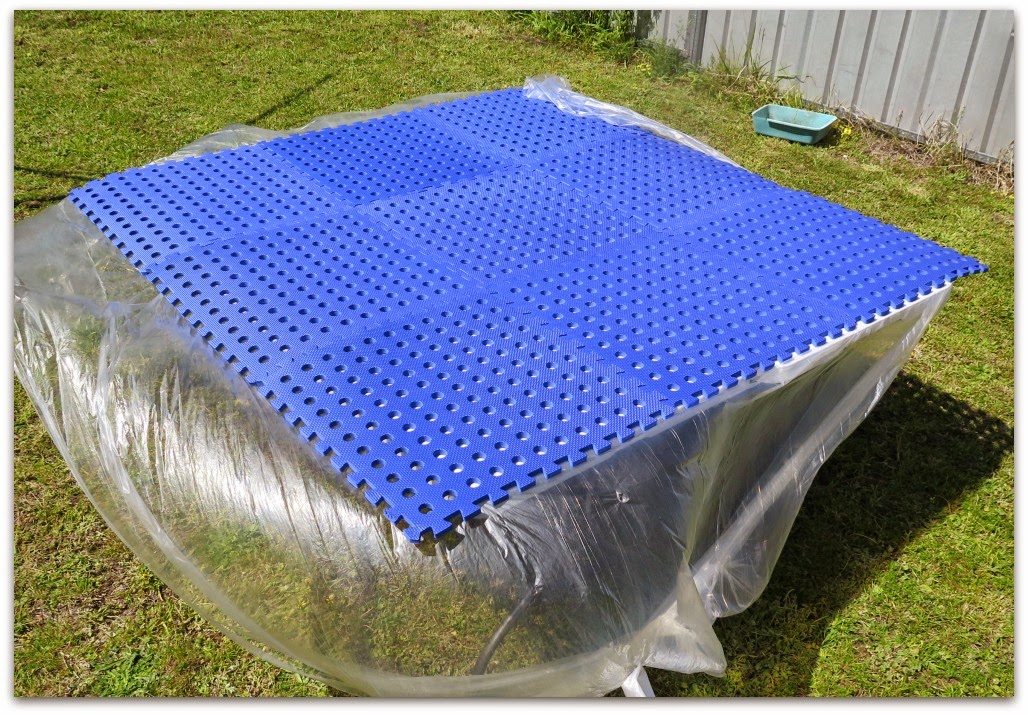
Then it's onto the blocking. I used two 6 foot tables with camping mats on top. This saves lots of bending or kneeling. The mats allow you something to pin the quilt to. I also put a layer of plastic drop sheets on top of the mats, to make sure no colour transferred to the quilt.

Then it's just a matter of laying the quilt down and pinning to the mats. The tables were just a little bit too small, so I pinned to the inner border, inside the HST border. I didn't go to the extent of measuring diagonals etc for perfect squaring but did it by eye. Remember to not over stretch the quilt at because it will shrink as it drys. You want it taught but not stretched.
You can see in the close up below how the wrinkling is reduced. It's not eliminated but it is alot less. This is after it was dried. I forgot to take a close up when it was wet. But it was pretty wrinkly but all the fabrics in this quilt had been pre-washed, so it wasn't too bad. 

So now all I need to do it trim and bind. Nearly there!!!


3 September 2013

Field Greens Quilt Finished

Yay, another finish while I was on break. I did want to do more but I am happy with two quilt finishes.

I went a bit old school on this one. I've been spending a small fortune on batting. I usually buy cotton but I wanted something a bit warmer as I don't have any quilts with non-cotton batting, which is fine for the majority of the year, but in the middle of winter, doesn't really cut it. So I thought why not use some of the many wool blankets I own? I have them in a variety of sizes and thicknesses. So I thought for this one, I'd go with a very thin blanket.

Here is a picture of me trying to iron the finished top before basting the layers together. Cleo really wanted attention that day. She followed me around everywhere, which isn't like her at all.


I have a large number of blankets which I bought to make clothes with (re-enactment) but I haven't gotten around to it, so I thought why not? Many of them a not the nicest colours or have some marks on them. Also, even nice well used ones can be a bit scratchy. Not a problem when inside the layers of a quilt.

I did a simple grid quilting at 3" apart. I wanted to do quilt dense quilting as the blanket has alot more movement than normal quilt batting. It would also put more pressure on the stitching when wet, so the more quilting the better. I managed to get the quilting done in one day, with a couple of breaks. While the wool sewed fine, it was a bit of extra work as it is much heavier than either wool or cotton batting. The finished quilt is quite heavy for a 72" x 72" finished.

And here is the finished product in use. Miss Cleo really does love snuggling in finished quilts. I think she really likes this one cause it's green and cause it's super warm.

21 August 2013

Blue & White and Yellow Split La Moyne Star Finished

Another finish!! I managed to get this quilted in only a couple of hours. I kept it very simple, stitch in the ditch. It is by far and away the worst workmanship in any quilt I've ever made but it's finished and it's a useable quilt. The quilt finished at 55" x 55".

Cleo was pretty good, she waited until the quilting was finished before she tried to lay on it!! 

As I was working on finishing this off, I was adding rounds to my repro log cabin blocks. By doing it this way, I was able to get another 55 blocks finished without much additional effort. These blocks finish at 7".

12 August 2013

Blue and White Twister Cat Quilt Finished

I made this using the large Twister template. I made it for my friends cat! Hey, I needed a quick win.
The first stage is to sew the various squares together. I went for simple light/dark alternating pattern. Then you line up the template and cut. Then they are realigned and sewn together in rows. It really is a very quick technique and easy for learners. Very forgiving.
 Because this was a cat quilt, I wanted to use some of my batting scraps rather than use "new" stuff. I have some quite wide offcuts from bigger projects, so I only needed to sew two pieces together. So I squared up the batting to get straight sides. Then just ran them through the machine using a zigzag. It sits very flat.
Once it's sewn I spray based it. Very quick way to do it.

Then once it was done I did a very simple straight line quilting using my walking foot, 1/4 inch on each side of the main seam and then across the squares created by that quilting.

And here is the finished product! It measures about 25" square (only a guesstimate, I forgot to measure!!)
And here it is ready to be given to the slave of said cat!

21 May 2013

Pink and Grey Log Cabin Finished

My Pink and Grey Log Cabin Quilt is finished! I am SO happy with how this one turned out. I don't normally work well with lots of printed fabrics, but I think I've nailed it with this one.

Here is the finished product. It sits nicely on the top of a double bed, with a teeny bit of overhang.
I wanted to keep the quilting on this one simple, as the colours and fabric are quite busy. So I just did quite wide apart straight line quilting following the zig zab pattern of the quilt. This also worked well with the back of the quilt which I did another pieced back on (I am sooo hooked on these as it means I can use normal width fabric for backs and not spend on the extra wide).
I gave plenty of thought to the binding. I really wanted to do a bright green to mirror the centre square of each block but didn't have the right colour on hand. So I went with the grey dots!!
And here is a final arty shot. I suck at these!!

1 May 2013

Omigosh Redux Quilt Finished

My Omigosh Redux quilt is finished!!
I started and finished the quilting on ANZAC Day and then bound the next day. A simple cross hatch based on the blocks. I stuffed it up a bit. I was going to do quilt big gap quilting but miscalculated. And it was easier to add more quilting than to take out what I'd already done. But I still looks good. There are a couple of bumps from where I went back and there were movement.
Here I am squaring up the quilt. I always really enjoy this step. Makes the reality of finishing immediate. I also really enjoy binding the quilts. Although that is a bit of a struggle at the moment with the vision problems I am having.

Here is a close up of the finished product.
Here the quilt is finished being quilted, but not squared up yet. Miss Hattle says it's very comfortable!!

4 March 2013

Pink and Green Twister Baby Quilt Finished

And another one done!! This one is for my about to be grand neice. I love the Twister templates for quilts like this. Just very basic but sturdy quilting for something which will get a lot of wear (hopefully!).

If you'd like to see how the Twister template was used with this quilt, check out my previous Pink and Green Twister post.

Below is Hattie helping me with the binding. Which reminds me, this was my first attempt at mitred corners. Why have I not been doing this the whole time??? So much easier. And I found a great tutorial for doing the final join when putting the binding on - Bumpless Binding Finishing Trick:


27 February 2013

Repro Plus and Cross Quilt Finished

Yay, my Repro Plus and Cross Quilt is finished. I decided on a solid red binding and I'm really happy with how it turned out. I am hooked on the #xplusalong I think I need to make another one.

Previous post on initial construction of this quilt.


It is actually square, just looks a bit skew if cause of the angles.
The back looks really great as well. I think you could definately use this one as a double sided quilt.This side is very minimalist.
And finally, the arty cover shot!!