Showing posts with label quilt. Show all posts

4 December 2013

Still Alive and Kicking

I've been absent from the blogosphere for about a month. I stopped sewing as I was trying to get some of my handmade leather journals done for a craft fair. Turned out to be a bit of a waste of time as I only sold one book!! Anyway, here is a picture of what I made.


This is the furbabies helping me with some cutting out. I've been quilting for a while but you never stop working out better ways to do things. I've been using a big folding table for my quilting. I can set it up and take it down quickly and lets me work in the room with the best light.

However, it's quite low. So when cutting it can get quite tiring. I had visitors last week and put my normal table away. Once they were gone and I wanted to do some cutting, I put up another folding table I have, this one is smaller, but it is height adjustable. I put it up to the maximum height, and boy what a difference!! Sooo much easier to cut and no more sore neck or shoulders. I will definately be using this one from now on. I am thinking of getting another one, to be set up at a lower height for sewing. It will be a better set up as it will take up less room, as I can slip one under the other but still have a cutting space and a sewing space.

This is the kitties helping me use my Westalee rulers. I've had them for ages but not used them. They've been great for cutting out so far. I like the idea of sewing the bias before cutting the triangles. These will be for donation quilts.

I just wanted to sew!! Lots of HST in progress and some green and yellow pinwheels for another donation quilt.

13 August 2013

Field Greens Progress

I am trying to be good about not starting new projects until I clear up my pile of WIP's. But I couldn't help but do some work on my Field Greens quilt. I had already cut up the strips into the 6" pieces needed. I then did a bit of mini-marathon and sewed on the 2.5" corner triangles. Then the boring job of trimming them all off. I know that some people find this method a bit wasteful, but it really is more accurate than working with cut triangles and sewing on the bias line. Also, since I had so many off cuts, I've kept them and added them to my mini-quilt stash for future use. Here is the pile of finished strips.

And here they are trimmed with the large pile of HST cut offs.


The small HST will become my headers/enders for my next project.

12 August 2013

Blue and White Twister Cat Quilt Finished

I made this using the large Twister template. I made it for my friends cat! Hey, I needed a quick win.
The first stage is to sew the various squares together. I went for simple light/dark alternating pattern. Then you line up the template and cut. Then they are realigned and sewn together in rows. It really is a very quick technique and easy for learners. Very forgiving.
 Because this was a cat quilt, I wanted to use some of my batting scraps rather than use "new" stuff. I have some quite wide offcuts from bigger projects, so I only needed to sew two pieces together. So I squared up the batting to get straight sides. Then just ran them through the machine using a zigzag. It sits very flat.
Once it's sewn I spray based it. Very quick way to do it.

Then once it was done I did a very simple straight line quilting using my walking foot, 1/4 inch on each side of the main seam and then across the squares created by that quilting.

And here is the finished product! It measures about 25" square (only a guesstimate, I forgot to measure!!)
And here it is ready to be given to the slave of said cat!

1 July 2013

Cold, Wet Day for Quilting

It's been raining here on and off for a week now. It is getting colder and wetter. The perfect weather for a pit of hand quilting.
Cold, rainy weather. Perfect for hand #quilting my Old Fashioned Charm #repro #quilt while watching tellie.


I had a couple of days off during the week.I was just really under the weather. I didn't do anything but the occasional bit of hand quilting in between naps.

Too cute not to post another one!! #cat #catstagram #cleo

I am feeling a bit better now, but I have holes in my fingers from the quilting. I am happy with this, however, because I really want to get this quilt done. It's been sitting in the spare room for years while I took a break from quilting and did scrapbooking. But I love this quilt and I'm in the home stretch now. I think I should be able to get this finished in the next couple of months. I've almost finished the middle section and the borders will be basic cross hatching, so it shouldn't take too long.

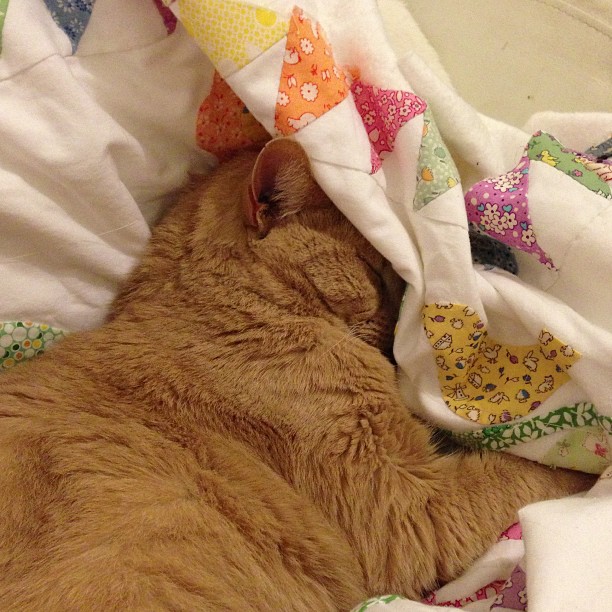
Miss Cleo here will only sit on my lap about once or twice a year and I HAVE to have a quilt on my lap for that to happen. She loves a cuddle, but against your side, not your lap.

#cleo will ONLY sit on my lap when there is a #quilt on it. So one of my two or three times a year cuddle!! No more hand #quilting for the moment.

21 May 2013

Pink and Grey Log Cabin Finished

My Pink and Grey Log Cabin Quilt is finished! I am SO happy with how this one turned out. I don't normally work well with lots of printed fabrics, but I think I've nailed it with this one.

Here is the finished product. It sits nicely on the top of a double bed, with a teeny bit of overhang.
I wanted to keep the quilting on this one simple, as the colours and fabric are quite busy. So I just did quite wide apart straight line quilting following the zig zab pattern of the quilt. This also worked well with the back of the quilt which I did another pieced back on (I am sooo hooked on these as it means I can use normal width fabric for backs and not spend on the extra wide).
I gave plenty of thought to the binding. I really wanted to do a bright green to mirror the centre square of each block but didn't have the right colour on hand. So I went with the grey dots!!
And here is a final arty shot. I suck at these!!

6 May 2013

Pieced Back for Pink and Grey Log Cabin

I didn't want to buy a backing specifically for my Pink and Grey Log Cabin quilt. And I didn't have enough of any one grey fabric to make one. Added to which, I had have seams on the back. So this equals the need for a pieced back. As I planned to do a zig zag quilting following the lines of the log cabin I wanted to do a pieced backing that would reflect this design, this is what I came up with.

It looks a bit saggy here, but I'm happy with how it turned out. I've now got the quilt basted and the challenge will be to make sure the back and front zig zag line up. I think this would make a great, quick quilt project.

1 May 2013

Omigosh Redux Quilt Finished

My Omigosh Redux quilt is finished!!
I started and finished the quilting on ANZAC Day and then bound the next day. A simple cross hatch based on the blocks. I stuffed it up a bit. I was going to do quilt big gap quilting but miscalculated. And it was easier to add more quilting than to take out what I'd already done. But I still looks good. There are a couple of bumps from where I went back and there were movement.
Here I am squaring up the quilt. I always really enjoy this step. Makes the reality of finishing immediate. I also really enjoy binding the quilts. Although that is a bit of a struggle at the moment with the vision problems I am having.

Here is a close up of the finished product.
Here the quilt is finished being quilted, but not squared up yet. Miss Hattle says it's very comfortable!!

4 March 2013

Pink and Green Twister Baby Quilt Finished

And another one done!! This one is for my about to be grand neice. I love the Twister templates for quilts like this. Just very basic but sturdy quilting for something which will get a lot of wear (hopefully!).

If you'd like to see how the Twister template was used with this quilt, check out my previous Pink and Green Twister post.

Below is Hattie helping me with the binding. Which reminds me, this was my first attempt at mitred corners. Why have I not been doing this the whole time??? So much easier. And I found a great tutorial for doing the final join when putting the binding on - Bumpless Binding Finishing Trick:


27 February 2013

Repro Plus and Cross Quilt Finished

Yay, my Repro Plus and Cross Quilt is finished. I decided on a solid red binding and I'm really happy with how it turned out. I am hooked on the #xplusalong I think I need to make another one.

Previous post on initial construction of this quilt.


It is actually square, just looks a bit skew if cause of the angles.
The back looks really great as well. I think you could definately use this one as a double sided quilt.This side is very minimalist.
And finally, the arty cover shot!!

19 February 2013

Competition Winner is....

The Winner of the Dresden Plate template is....Teresa!!

Congratulations, Teresa. I will email you to get your address. Sorry Joy and Joyce!!

Since there were only three entries, I just wrote the numbers on paper and got someone from work to pick it out of a cup!! So much easier than using the Random number thingy. Well, it's easy to use, it's getting the image that's a pain.

To add some colour to this post, here is a picture of a very old UFO that I am trying to finish. I got it to this stage about 15 years ago, then I stopped sewing and there it sat. I've dug it out to finish it. I don't have any of the cream left, so I can make any more blocks. It's a bit of an odd size, too long for a baby quilt but not quite wide enough for a lap or single bed quilt.

I found a purple and black stripe fabric that I think will make an interesting binding. I am going to try and pick up some batting during the week and get it quilted on the weekend. Man, I am powering through things now I've discovered machine quilting. I got my Japanese X and Plus and a baby quilt, quilted on the weekend. Yay!!


15 February 2013

Repro Cross and Plus Quilt

So, I have always resisted Instagram, but last week I signed up for it and now I'm hooked. A couple of quilt-a-longs have been running on there and I sort of got hooked on the Japanese Cross and Plus one - #xplusalong! But I wanted to do it in something I actually had enough fabric for. So I started one in 1930's Repros, which is actually a good fit I think, as this is when the block is first dated to.


I have to say, I got a bit carried away. Most people are doing scrappy versions. This becomes a lesson in sitting down and thinking first, before cutting. I decided I liked the look of red crosses. I normally don't like the red in the repro palette. I tend to find it jarring against the pastels, but I am growing to like it and I think the contrast works really well with this block. Anyway...I cut up all the pieces, as you can see below.


For the most part this was not a problem. But I realised way too late that I could've saved myself alot of time cutting and ironing if I had strip pieced the red and white two patches that I needed. Lesson learned!!


The corner blocks produced many, many offcuts, which have now become little HST (used as leaders and enders in the string piecing!!). I think these will become several mini-quilts!!


Rather than joining the blocks straight to each other, I am using sashing. This sashing will then create secondary crosses between the blocks and make an all over pattern.


This is what the rows look like sewn together.


This is the completed top. No border is planned. The blocks are 10" finished. I had hoped to start quilting it this week but various things came up. I am determined to get it done this weekend!!

8 February 2013

Pink and Gray Log Cabin and Competition

So I've finished a pile of traditional layout Log Cabin blocks using modern colourings. Now comes the hard bit, what layout do I use? Below is a collage (thanks  PicMonkey!) of some of the more common Log Cabin settings.

As with my Repro Log Cabin blocks, I'm having trouble deciding what layout to use.


Competition 


NOTE: I had the wrong date for this competition - it finishes 18 Feb 2013!!

Anyway, in an effort to make a decision, it's time for a bit of audience participation. I've put some more detailed photo below. The prize is a 20 wedge Dresden Plate template from Matilda's Own. Somehow, I've ended up with a couple spare of these, so I figure better to give them to a new home than just sit in my cupboard. It's brand new, never used.

If you've never used these templates, they are super easy to use. You can complete a plate very quickly and it's all straight sewing, no funky seams.

So, to enter the competition, just post a comment telling me which layout you like best for these blocks. Or, if it's not shown here the name (or a link to a picture) of another setting you think I should try.

If you want a second entry, then start following my blog or let me know if you are already a follower.

I will cover postage costs and it's open to anyone, anywhere in the world. Competition will be drawn Monday 18 February 2013 (Aussie time).


Barnraising

Fields and Furrows

Streaks of Lightening

Log Cabin Star

Straight Setting

Sunshine and Shadow

On a side note, if you are interested in Log Cabin quilts, a publisher is making a free ebook (pdf) on Log Cabin Quilts available. You have to sign up, but the book is really good, a bit of history of the style, diagrams and names of various layouts and some REALLY useful tables of cutting instructions for various sizes and styles of Log Cabin. Definately worth signing up for. They also have five other free ebooks if you sign up for a website account.

1 February 2013

Spiked Dresden Video Tutorial


A couple of people have asked about how the insert works. So I've done a very quick video up. I hope this will be helpful.

Please keep in mind that this production involved my iPhone, a garbage bin and a can of cannilleni beans!

Please go here for the original Spiked Dresden Plate tutorial.

29 January 2013

Japanese X and + Progress

I finally bit the bullet and sewed these blocks together. Cause I'd run out of the background green, I only had enough fabric to put four blocks together. I have two others left over.

I have plenty of the Gatsby fabric left, so now I have to decide what colour to use for the background. I'm thinking a bone or taupe? Any comments? What about something completely left field? I'd love to hear your thoughts.
This is the construction. If you put a strip between each block, you then get a repeat of the overall pattern. Good bang for your buck!!
Each of the blocks had the same green background, then the cross done in various fabrics from the Gatsby range and the plus done in a dark brown (one of which was from Gatsby).
This one has be matching Gatsby brown.

This is Cleopatra making sure it's comfy!!